This is the last of a serie of 7 posts about home automation from nothing to done. Each of them marks a milestone in the project and none of them should be too long to comfortably read in the metro when commuting.
- Part 1: Existing home automation systems and picking the right one
- Part 2: Smart lights and plugs
- Part 3: Smart heating
- Part 4: Setting up scenes and scripts
- Part 5: Adding smart behaviors with automations
- Part 6: Talk to your system with Amazon Echo
- Part 7: Get the party started with multi-room audio
In this post we’ll see how to setup a multi-room synchronized audio system, similar to the ones you could achieve with a set of Sonos speakers or the like. In case you didn’t read the first six parts, please take into account that I’m using Home assistant as my home automation software. I have it running on a Raspberry Pi 3, but if you just want to try it out and don’t want to commit buying a device you can install it on your desktop or laptop. I strongly recommend using their docker image in this case since it’s the fastest and less intrusive way to try it out.
At the end of this post we’ll be able to:
- Play an audio track in a specific room
- Play an audio track in multiple rooms, with synchronized audio
- Automatically play a Spotify playlist every morning for a given amount of time
- Have a party playlist that guests can edit to fit their tastes
all with a user-friendly interface.
Chromecast Audio

As a replacement unit for an expensive Sonos speaker, we’re using Chromecast Audio devices. These are tiny units that connect to an outlet and an existing active speaker through the Aux 3.5mm cable. They cost only 35$/€ and can make any of your old speakers smart.
I have 3 in my flat attached either to active speakers, bluetooth speakers or, in the living room, to a Denon AV Receiver. I estimate I saved around 500€ through this setup, when compared to existing branded multi-room audio systems.
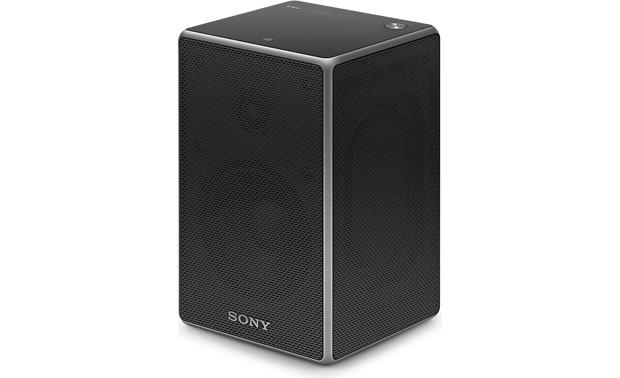
The Sony SRS ZR5 Chromecast-enabled speaker
Another option that saves a power outlet slot is buying a Chromecast-enabled speaker. During Prime Day this year I bought a Sony SRS ZR5 for just 90€ instead of the usual price of more than 200€. I’m really glad I gave it a try since I can basically leave it in standby 24/7 and it will automatically turn on when audio is streaming to it (and turn off after 15 minutes of inactivity). I’m now planning to replace the bluetooth speaker and the dining room studio monitors (both attached to Chromecast Audio units) with similar Chromecast-enabled speakers so that I don’t need to manually turn them on/off anymore. The downside is that they’re more expensive (another “cheap” alternative is the JBL at 150€, far more expensive than the cheapest “dumb speaker + Chromecast audio” combination you could get, but still cheaper than the cheapest Sonos Play:1 at 230€).
Even without implementing any of the steps I’m going to outline in the next paragraphs, you can have a synchronized multi-room audio stream just with the Chromecasts. Go through the setup of the devices with the “Google Home” app (iOS, Android), adding your devices following the detailed instructions in the apps. You can then create “Groups” of multiple devices and they’ll appear as additional devices you can stream to. Then, from apps like Spotify (you’ll need a premium account, otherwise you can open the web interface with the Google Chrome browser and cast from there) you’ll be able to stream a song or a playlist to the created group and the audio will play in all the rooms you configured for it. You’ll be stunned by how professional this will already sound!
MPD
To be able to interact with the Chromecast devices from our Home Assistant installation we don’t need to do anything. The discovery component already supports auto-discovery of the Chromecast devices and shows which songs they are currently playing. Moreover, you are able to pause/resume/stop the playback and change the volume, right from the Home Assistant interface.
What we want to do, though, is play songs without opening Spotify, for example to let our guests play songs or look at the current playlist without using our laptop and without needing a laptop at all.
For this, we need a software called MPD, which Home Assistant also integrates with.
![]()
The underwhelming logo of a great software
The installation of this software is a bit more complex since it involves multiple manual steps, a terminal, and manual editing of configuration files. Please bear with me nonetheless, since the results will be well worth the effort!
First of all, I suggest to install MPD on a different device (I have it on a separate Raspberry Pi). This is to avoid having too many eggs in a single basket and having both Home Assistant and MPD fail if the device bricks. You are of course free to install MPD on the same device that runs Home Assistant.
These are the initial steps to execute to install MPD (the official installation documentation is here):
wget -q -O - https://apt.mopidy.com/mopidy.gpg | sudo apt-key add -

sudo wget -q -O /etc/apt/sources.list.d/mopidy.list https://apt.mopidy.com/jessie.list

sudo apt-get update

sudo apt-get install mopidy
This installs the mopidy (MPD) package on the device.
We now need some plugins in order to make the installation easier to use and more beautiful to see!
First of all, a plugin that lets us play audio from YouTube videos as if they were songs.
# This plugin is to play audio from YouTube videos, for instance
sudo apt-get install gstreamer1.0-plugins-bad
Then, the most important plugin: the one that allows MPD to interact with Spotify. This requires a Spotify premium account. I didn’t have one before, but once I realized what I could have been able to do through it, I happily decided to spend 9,99€/month.
The official documentation for this plugin is available here. I strongly recommend you to read it, since it explains how to setup a specific password you’ll be able to use just for the MPD installation.
sudo apt-get install mopidy-spotify
We’ll now install pip, a software that allows us to easily install Python packages.
wget https://bootstrap.pypa.io/get-pip.py

sudo python get-pip.py
The next plugin allows our MPD installation to interact with Last.fm and scrobble the tracks we listen to through MPD. If you don’t have Last.fm or are not interested in this feature, you can skip this line.
The official documentation for this plugin is available here.
sudo pip install Mopidy-Scrobbler
Last but not least, we’ll install the beautiful Iris interface for our MPD installation.
These are some pictures of my Iris installation and how yours will look like:


The interface is also responsive and will look beautiful on your smartphone and tablet.
sudo pip install Mopidy-Iris
Now we can enable the mopidy process to start at system boot.
sudo systemctl enable mopidy
After you ran the steps above, you should be able to access the iris interface through http://[YOUR_IP_ADDRESS]:6680/iris.
Before anything useful happens, though, we need 2 more things: install IceCast and configure our MPD installation.

As I said, please bear with me :)
IceCast
IceCast is (with their own words)
a streaming media (audio/video) server which currently supports Ogg (Vorbis and Theora), Opus, WebM and MP3 streams. It can be used to create an Internet radio station or a privately running jukebox and many things in between.
What are we going to do with it?
Chromecast units work by streaming audio from URLs. Home Assistant lets us play our own audio through the Chromecasts, by specifying a URL. Thus, we need a URL where our audio can be streamed first, so we’ll be able to pass this to Home Assistant and the Chromecasts in turn, and listen to our tracks through them.

IceCast lets us do exactly this. We’ll route the audio stream that MPD plays to IceCast, and it will be available through a URL.

sudo apt-get install icecast2
The official documentation on how to install IceCast is available here.
This is all we have to do to install IceCast, now let’s configure the whole system and let the party started!
MPD configuration
The following is my configuration file, explained:
# Default installation parameters

[core]
cache_dir = /var/cache/mopidy
config_dir = /etc/mopidy
data_dir = /var/lib/mopidy

[logging]
config_file = /etc/mopidy/logging.conf
debug_file = /var/log/mopidy/mopidy-debug.log

[m3u]
enabled = true
playlists_dir = /var/lib/mopidy/playlists

# This is the essential step!
# We tell MPD to route its output to an mp3 encoder and then to icecast
# The port and password values depend on your icecast installation!
[audio]
mixer = software
output = lamemp3enc ! shout2send mount=mopidy.mp3 ip=127.0.0.1 port=[YOUR_PORT] password=[YOUR_PASSWORD]

[proxy]

[mpd]
hostname = 0.0.0.0

[http]
hostname = 0.0.0.0

[stream]
enabled = true
protocols =
    http
    https
    mms
    rtmp
    rtmps
    rtsp
timeout = 5000

[softwaremixer]

# This is in case you installed the Last.fm plugin
# Username and password are your Last.fm credentials
[scrobbler]
username = [YOUR_LASTFM_USERNAME]
password = [YOUR_LASTFM_PASSWORD]

# This is for the Spotify integration
[spotify]
username = [YOUR_SPOTIFY_USERNAME]
password = [YOUR_SPOTIFY_APP_PASSWORD]
Let’s reboot our MPD host through sudo reboot and we should be able to make searches on Spotify, see our playlists and play some tracks through the Iris interface at the address I mentioned above.
Of course you won’t be able to hear anything, that is, until you open this URL from your browser: http://[YOUR_IP_ADDRESS]:[YOUR_ICECAST_PORT]/mopidy.mp3. Once you press play, you should be able to hear the song you’re playing through Iris!
The last step is the Home Assistant integration. With it, we’ll be able to automatically stream to our Chromecasts as soon as we play a track, and turn our Chromecasts off as soon as we stop.

Home Assistant integration
First of all, let’s add our MPD setup to Home Assistant in the media_player section:
- alias: 'Music Pi'
  platform: mpd
  name: 'Music Pi'
  host: [YOUR_IP_ADDRESS]
Then, let’s add a script that streams the audio to the Chromecasts
stream_mopidy_to_cc:
  alias: Start streaming
  sequence:
    - delay: '00:00:05'
    - service: media_player.play_media
      data:
        entity_id: media_player.home
        media_content_id: 'http://[YOUR_IP_ADDRESS]:[YOUR_ICECAST_PORT]/mopidy.mp3'
        media_content_type: 'audio/mp4'
With the above script we’re telling the home media player (this is the name of the Chromecast group we want to stream to) to play the URL I mentioned before. That is, the URL that IceCast exposes with the audio coming from MPD and the Iris interface.
We are delaying the script by 5 seconds to give IceCast the time to buffer.
The last step is to automate this behavior:
- alias: Cast music when playing from MPD
  trigger:
    platform: state
    entity_id: media_player.music_pi
    to: 'playing'
  action:
    - service: script.turn_on
      entity_id: script.stream_mopidy_to_cc
This means that every time MPD changes to playing (for instance, when we start a playlist), the stream_mopidy_to_cc script will start, streaming the audio to our Chromecasts. Pretty neat, uh?
With this post we were able to configure a multi-room audio system that can be used through mobile devices and apps like Spotify (even from your personal computer), our home automation software, and a user-friendly interface that you and your guests can easily access.

I hope you enjoyed this serie about home automation and you learned how you can easily implement a sophisticated smart home system only through open-source or free software and very cheap components. If you’d like to read about any other specific system or feature, please let me know through the comments and I’ll try to write some more posts!
Have fun tinkering with your smart home automation system!
